19 August 2020
Creating a Binary Framework in iOS with Swift
We all use a lot of frameworks in our daily development routine. We just type the magical word “import” and it’s all set. But what’s happening behind that import statement? How do you make it possible for your fellow developers to use your classes with just one line of code? Today, I’ll try to show you how to create a binary framework.
First, it’s better to understand the difference between framework and library, a subject that we commonly come across in iOS developer interviews.
- Library is a file that defines bunch of code; not part of your original target. A library can be dynamic (.dylib) or static (.a)
As you can understand from their names, static libraries are compiled once since the file size can be bigger.
Dynamic libraries, on the other hand, are loaded into memory when they are needed. This can be loadtime or runtime. All Apple system libraries are dynamic.
- A framework is a package that contains resources like dynamic libraries, images, interface builder files, headers etc. It is basically a bundle that ends with .framework extension.
We will cover frameworks in this article.
Let’s dive into Xcode and see how to create one.
First, we need to choose Xcode -> New project -> Framework.
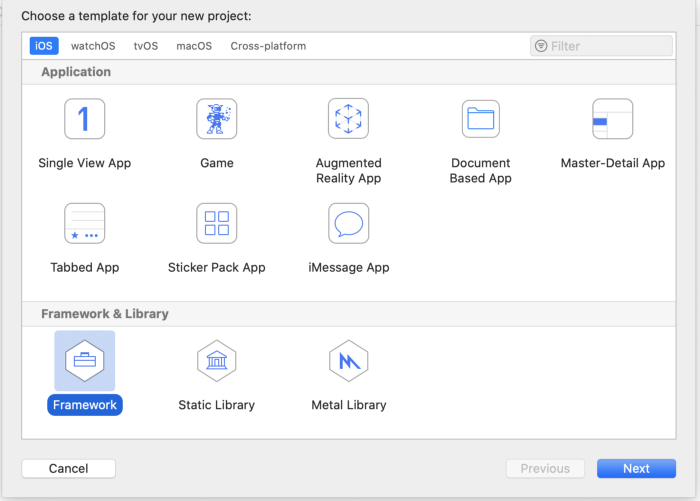
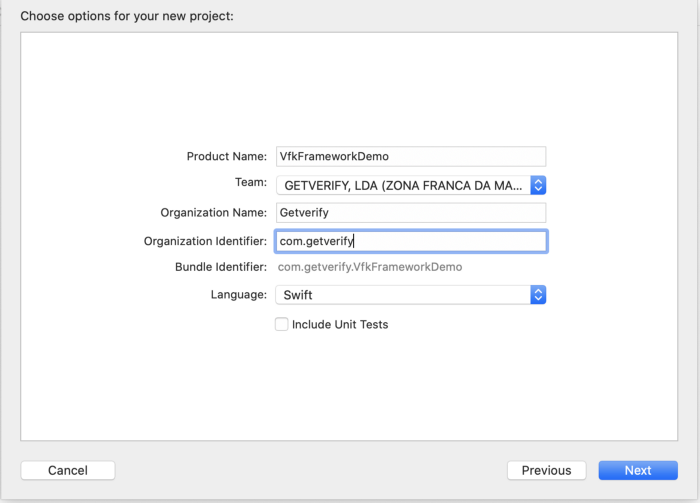
In this demo, we name our project VfkFrameworkDemo. It will be the name of our framework, too.
After creating a new framework project, all we see in our bundle is a single .h file.
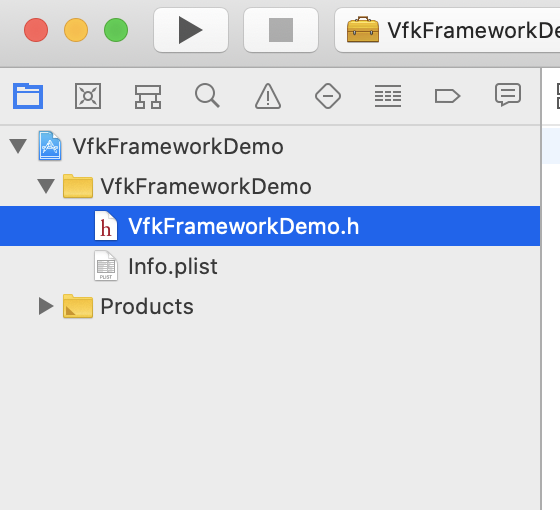
We can leave that .h file as it is, we won’t be needing it later.
Let’s create a new swift file named, VfkFrameworkLogger.swift (filename doesn’t matter really) and add the code below.
import Foundation

public class VfkFrameworkDemo {

    public init() {
        debugPrint("VfkFrameworkDemo initialized.")
    }
}
Important side note:
Classes and functions which will be used in integration must be marked as public.
You can still keep your internal classes; they won’t be available to the developer who uses your framework.
That’s the beauty of binary frameworks; people can use your code in background, but they can’t see what you don’t want them to see. Privacy matters.
If we select “Generic iOS Device” from device list and build project, we see a file named VfkFrameworkDemo.framework in Bundle, under Products folder.
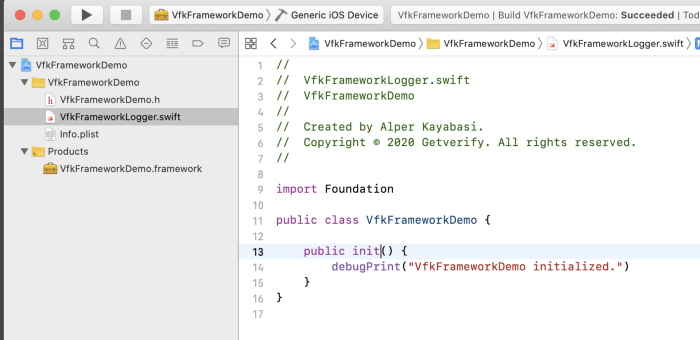
This is our first framework, now we can use it with drag and drop.
Well, that was simple. Are we done? Not quite.
The first problem we’ll encounter here is “targets.” We built our framework for “Generic iOS Device”, which means our framework can only be used on real devices.
That’s a bummer. A lot of iOS developers use simulators. What should we do?
Let’s change our target to “iPhone 8 simulator” and build again.
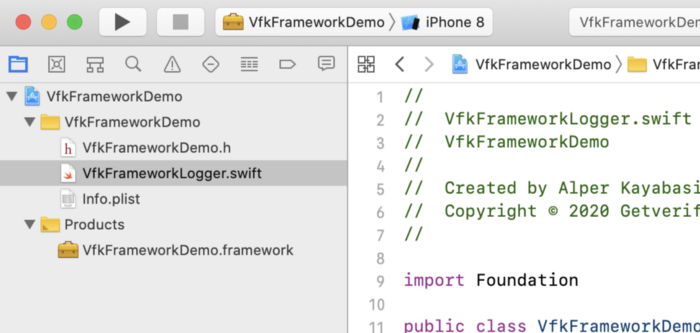
We did it, and now our framework can be used on a simulator. But wait…
We still need “real devices”, too.
Fortunately, there is a way to combine these two frameworks and create a universal one which will work both on device and simulator.
This workaround is generally referred as “aggregate target” and it’s a simple way to create universal framework in Xcode, without the need of using Terminal. (We can still use terminal for this process btw.)
Let’s create a new target with File -> New -> Target -> Aggregate.
For the sake of understanding this process, we name our new target “Aggregate”.
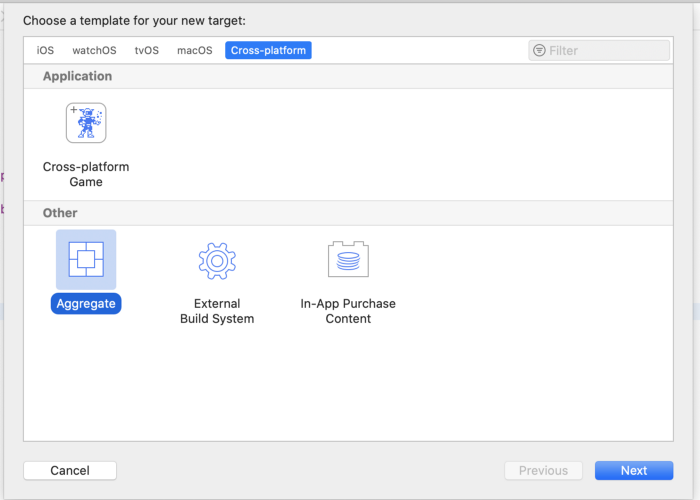
After creating our new target, we need to switch to “Aggregate”, so go to “Build Phases”, and create a new “Run Script”.
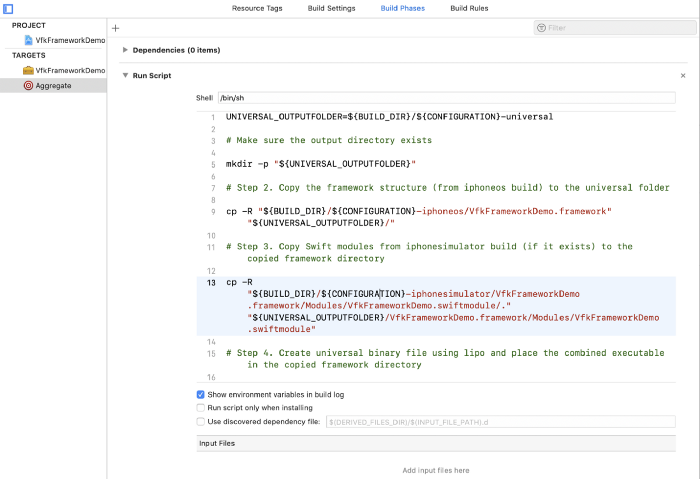
This is the code snippet we’ll use in the script.
UNIVERSAL_OUTPUTFOLDER=${BUILD_DIR}/${CONFIGURATION}-universal

# Make sure the output directory exists

mkdir -p "${UNIVERSAL_OUTPUTFOLDER}"

# Step 2. Copy the framework structure (from iphoneos build) to the universal folder

cp -R "${BUILD_DIR}/${CONFIGURATION}-iphoneos/VfkFrameworkDemo.framework" "${UNIVERSAL_OUTPUTFOLDER}/"

# Step 3. Copy Swift modules from iphonesimulator build (if it exists) to the copied framework directory

cp -R "${BUILD_DIR}/${CONFIGURATION}-iphonesimulator/VfkFrameworkDemo.framework/Modules/VfkFrameworkDemo.swiftmodule/." "${UNIVERSAL_OUTPUTFOLDER}/VfkFrameworkDemo.framework/Modules/VfkFrameworkDemo.swiftmodule"

# Step 4. Create universal binary file using lipo and place the combined executable in the copied framework directory

lipo -create -output "${UNIVERSAL_OUTPUTFOLDER}/VfkFrameworkDemo.framework/VfkFrameworkDemo" "${BUILD_DIR}/${CONFIGURATION}-iphonesimulator/VfkFrameworkDemo.framework/VfkFrameworkDemo" "${BUILD_DIR}/${CONFIGURATION}-iphoneos/VfkFrameworkDemo.framework/VfkFrameworkDemo"


# Step 5. Convenience step to open the project's directory in Finder

open "${UNIVERSAL_OUTPUTFOLDER}"
The process is simply explained in five steps.
First, we need to build our framework for both real device and simulator separately. After that, the run script will combine these two frameworks into one universal framework to rule them all.
- Choose VfkFrameworkDemo -> Generic iOS Device and build.
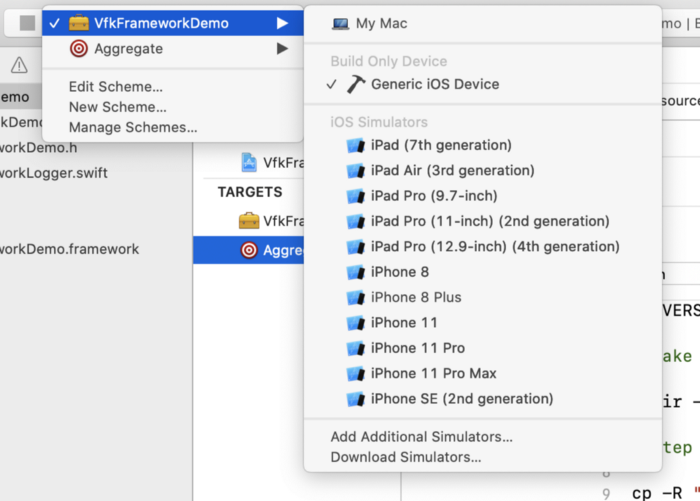
- Choose VfkFrameworkDemo -> iPhone 8 and build again.
- Choose Aggregate -> Generic iOS Device and build again.
After these steps, Xcode (the run script) opens the finder and shows us our universal framework. This file can be used on both simulator and real devices.
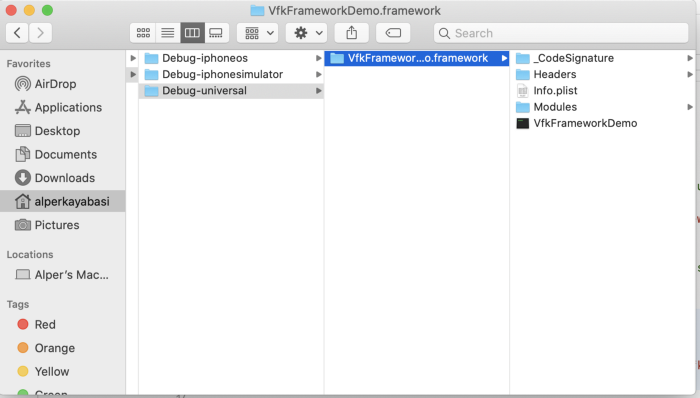
Drag it into Desktop, we’ll use it in a couple of minutes.
Create a new Single-View Xcode project. We don’t need anything special. We just need a clean project to import our framework into.
- Drag VfkFrameworkDemo.framework into the bundle.
- Go to project’s General settings, select Embed & Sign from Frameworks, Libraries and Embedded Content menu.

This step is not important at this time, but it must be done to use the framework on a real device.
P.S. If you distribute your framework with Cocoapods, it takes care of that signing issue on its own.
This is what our new project looks like.
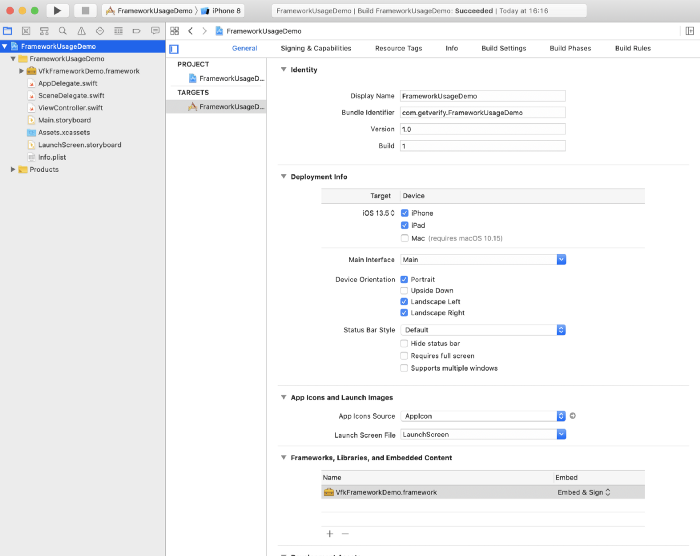
Open ViewController.swift and import VfkFrameworkDemo
Add the framework’s in it code into ViewDidLoad.
override func viewDidLoad() {
        super.viewDidLoad()
        // Do any additional setup after loading the view.

        _ = VfkFrameworkDemo.init()
    }
This is our ViewController.swift file. Now Build and Run the project and have a look at debug console.
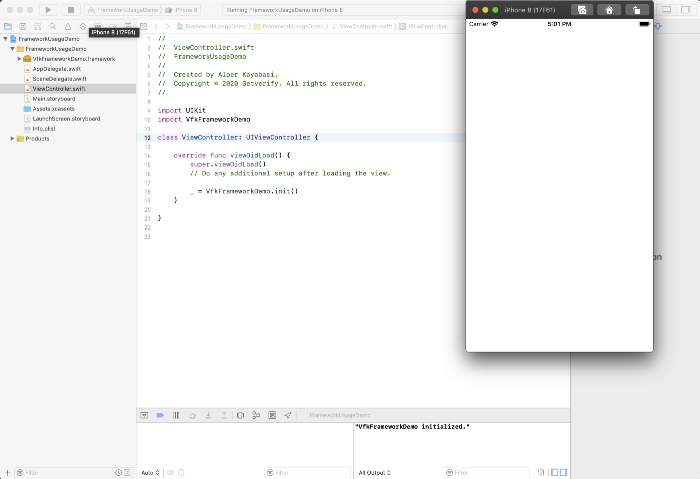
It worked! We just initialized our framework and used it from another project.
We didn’t see the framework’s code. We don’t know what happened in the background. With just a single line of code, the framework did its job −in this case, just a debug print− but it can be much more.
The ABI Stability came with Swift 5.1. That means a binary framework built with Xcode 10.2 or later can now be used on other Swift versions, too. Before that, a framework developer needed to build a new version of a framework for every Swift version. That was a real struggle but now it’s gone, kudos to Apple.
When creating VerifyKit, our development team came across with a strange bug. We can address this as “The corrupted .swiftinterface bug”.
We could use our framework on Macbook which built the .framework file without an issue, but when other developer tried to use it on another computer, Xcode gave the error “Failed to load module VfkFrameworkDemo”. (In our case, module name was VerifyKit)
We realized that Xcode created a corrupted .swiftinterface file and added our module name before every public class.
To fix this, you need to go framework’s folder in Terminal and run this line of code.
find . -name "*.swiftinterface" -exec sed -i -e
's/VfkFrameworkDemo\.//g' {} \;
This code snippet removes redundant module names (you need to replace VfkFrameworkDemo with your framework module name) in public class definitions, so everyone can use your framework.
I don’t know if this is a common bug, but it gave us a real headache, so I wanted to add this as a side note.
That’s it. We just created a universal binary framework in Swift and used it from another project.
We did it with the classic drag&drop, but there are other ways to distribute your framework, like Cocoapods or Carthage.
As you know, most common way to distribute your framework is Cocoapods. But unfortunately, it’s a subject for another article.
Please feel free to comment if you have any questions.
Don’t forget to check VerifyKit out!
Happy coding.
This article was written by Alper Kayabaşı, iOS Developer of VerifyKit
Share
